• Enter your email address to subscribe to this blog and receive notifications of new posts by email.

    Join 78 other subscribers
  • “Writing, to me, is simply thinking through my fingers” — Isaac Asimov

  • Recent Posts

  • Pages

  • Categories

  • Archives

  • Blog Stats

    • 195,689 hits

Super-Secret Project Revealed!

So, I know I’ve been teasing you over the last few weeks…referring to a Super-Secret Project but giving few, if any, hints.

Well, I am thrilled to FINALLY be able to reveal what I’ve been working on!!!

But first, a bit more of a tease.

I began this project on October 5, 2009.  Chicky and I had received an invitation to a friend’s bridal shower.

“K” and “T” were getting married!  They are a very special couple.  Both graduated from college in December, and T just got hired on as a full-time youth pastor at my church.  He’s been an intern for quite some time and is very close to the local kids.  K worked at the church last summer and became very good friends with Chicky.

This is a couple that adores being with teenagers.  They have been such a blessing to my own family, so I knew a special gift was in order.

I quickly decided on a project as, of course, a knitted item was in order.
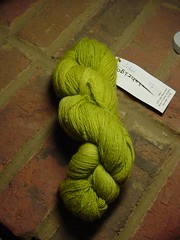
I bought the yarn…

Lion Brand Fishermen's Wool - Color 098 (Natural)

I was ready…confident that I would be able to finish the project in the three weeks time-span to the shower.

The knitting gods laughed at me.

I mean, let’s face it.  It was Fall…the holiday season.

I worked when I could, but other projects came up.

But then things settled down, and I finally focused all of my energy…

To finish…

The Tree of Life Afghan

Folks, can you believe that this pattern is free?  You can find it here.  There’s also a Ravelry group dedicated to this project.

Now, you know me, and you know I like cables and fancy patterns.  This project kept me interested.  The tree sections were actually the easiest and fastest to complete…

These panels alternate with garden sections, which required a new technique for me…using a crochet hook to pull the yarn from back to front (trust me…it’s not too hard when you read the instructions)…

The sections in-between were simple garter stitch…easy-peasy!

There are different arguments out in internet-world about the best way to complete the border.  I didn’t read ahead in the instructions, so I was oblivious.  I pretty much did what I was told and knit it separately from the rest, attaching it by using my own modified version of the mattress stitch…

The border was very simple but very elegant, forming leaf petals.  I worked on the border when I subbed for a history teacher for a week.  My classes spent most of their days watching movies…which allowed me a lot of time to knit as the movies were long, and my students were incredibly well-behaved!

Now, I’ve gotta say that I mustered up some brain power and smartly decided to leave live stitches on my needles, not binding off the edging until I was absolutely sure it was long enough.  I knit 58 repeats, stitched them to the blanket, and promptly ran out of edging.  So, I knit another 17 repeats, adding this portion to the blanket’s edge, and discovered I needed one more repeat!!  Oy!

In total, I worked 76 pattern repeats of the border.

The border really made this project complete.  It added a very elegant touch to what was already an incredibly amazing project (if I do say so myself).

Rooster and the Mr. held it up so I could get pre-washing/blocking pictures…

Now, allow me to tell you a story…real quick (yeah, right).

See, I knew I was going to have to wash this blanket…for several reasons.

First of all, this blanket almost had a bad accident, courtesy of Pele, mischievous pup that he’s become of late.

You see, one morning, shortly before Christmas, I had left the blanket on the table while I ran to the store.  When I returned thirty minutes later, I walked into the house to see a long, cream-colored string hanging off of the table.

“PELE,” I hollered, following the trail the string had left.

I followed it to the den, where my heart stopped.

There, on the floor, lay my up-to-then-completed blanket (maybe 1/3)…on the floor.

I checked it for holes.

Nothing.

However, I did notice that some of the stitches had come off the needles, which forced me to tink back the section I had just worked…about 12 rows.  At 180 stitches per row, um, well, yeah, you can imagine how mad I was.

And relieved.

But in the process, that blanket had been drug over a very hairy floor.

So yeah, I knew I was going to have to wash it before gifting it.

No easy task.

Fishermen’s Wool is 100% wool, which means no washing machine, and no dry cleaning (I checked).  Only gentle hand washing.

I feel like a bad gifter, putting this kind of burden on a newlywed.  Oh well, it’s warm and pretty…just don’t throw up on it!  Washing it is not my idea of a fun way to spend the day.

Anyhoo, I stuck the blanket in the tub, covered it with water and added a dash of dish detergent…

I took the water spray nozzle thing-y and rinsed it completely afterward.

And then I tried to pick it up.

Folks, this is one heavy blanket when it’s wet!  I had already mashed some of the water out of it, but oh my!  I laid towels across the ping pong table and rolled the blanket in them to remove more water…

Then, I placed fresh, dry towels on the table and blocked the blanket.  I wanted to open up the edging so it would lie flat.

The blanket took a few days to dry…especially with the cool temperatures we’ve had in Florida.

Then I had to wait because one of the newlyweds went out of town for a week.

Oy!  I was so excited to gift it (and blog about it)!!

And then last night finally arrived.

Gift time!!

K and T came to the house so they could open the gift in front of us.

I was so nervous!  Would they like it?  Would it match their decor?  Would they realize that I want them to USE this…not be afraid of the 100% wool thing?

I needn’t be afraid.  I think you can tell what they thought of it from the pictures below…

K inspected the work up close…

Final stats on this project:

Began on October 5, 2009
Bound off on January 18, 2010

Used 4.6 skeins (2,139 yards) of Lion Brand Fishermen’s Wool (Natural)

Knit on size 8 needles

Finished blanket size:  78 x 58

A special message to K and T:  Thank you for giving of yourselves so freely and unconditionally.  You have already had a profound affect on the children in the church.  More personally, though, my own children love you.  We have come to think of you as family.

We’re thrilled that God led you to each other, and I pray that when you look at the blanket, you will be reminded of the Lord and His promises.

I decided to make this blanket for a couple of reasons.  The Tree of Life Afghan symbolizes a couple of things…

  1. The Tree of Life in the Garden of Eden…a promise of eternal life spent with God one day to those who accept His love and sacrifice for us.
  2. The start of your own family tree.  May God bless you abundantly in the many, many years to come.

This gift was from the entire AuburnChick home.  I may have been the knitter, but each member encouraged me by their words and ooohhhh’s and aaahhh’s.  They also reminded me that I needed to stay on the ball and get it finished before it turned into a one-year anniversary gift!!

May you enjoy many chilly days snuggled under this blanket, and may you feel God’s love (and our’s) upon you during those, and all, times.

We love you guys!!

The Art of Felting a Booga Bag

Ok…so I haven’t blogged in a couple of days.

But, I had good reason!  I was busy finishing up a couple of projects and working on my super-secret project.

I’ve mentioned how I’m working on two Black Sheep Booga Bags.  Well, I’m happy to report that they are now FINISHED!  Woo Hoo!  (insert happy dance)

Before I started felting them, I thought to myself…”AuburnChick, some people out there either don’t know what felting is or are too intimated to give it a try.  Why don’t you show your faithful two readers (and anyone who might accidentally stumble on your blog) how it’s done?”

“Ok,” I said to myself, since not too many people tend to answer me back IRL (in real life).

WARNING:  This post is VERY picture-heavy.  I couldn’t help myself.  I am the Queen of do-it-yourself and pride myself on photographing each step of the process.

I started off with three skeins each of Noro Kureyon #95 and Noro Kureyon 209…

Noro Kureyon 95
Noro Kureyon 95
Noro Kureyon 209
Noro Kureyon 209

The knitting went quickly.  I finished up #209 first.  This is the bag that will be for the Mr.’s grandmother for Christmas.  She loves jewel tones.

The bag measured 13 x 12 pre-felting

Bag #2 is for a friend who saw my personal booga bag (I use it as a regular purse) and asked me to make one for her to gift to someone.  She ordered the yarn and gave it to me when it arrived.

I knit most of Bag #2 last Friday and finished it on Saturday.

This bag measured 13 x 11 pre-felting

Sunday was designated as felting day.

First of all, what is felting?  Well, the easiest way to explain this is to ask a question.

Have you ever thrown a sweater in the wash and had it come out all shrunken and fuzzy?

Then you’ve felted.

100% wool is a fiber that is ideal for felting.  The fibers shrink and lose their definition when they are submerged in water and agitated.  What you wind up with is a small, dense product.

As you can see from my pictures above, the purses would not be very useful before felting as pens and other small items would slip through the stitches.  That’s where the magic comes in.

First, I tied my bags and their handles in pillowcases.  I secured them with rubber bands.  This serves two purposes.  First, my knit items wouldn’t get hung on the agitator…especially the strap.  Second, when felting, pieces of fiber come off of the pieces.  These pieces can clog the washing machine and get stuck on the other items placed in the machine.  The pillowcases keep everything contained.

Each bag and corresponding strap went into its own respective case.  You dont want to mix different colored fibers.
Each bag and corresponding strap went into its own respective case. You don’t want to mix different colored fibers.

Next, I set my washing machine’s water temperature at the hottest setting possible.  I also set it for the smallest load and added a couple of pairs of blue jeans and a couple of full-sized towels.  These items add friction and help items felt more quickly.  One last thing I did was set the wash cycle to extra-heavy.  I wanted my load to get an extra beating.

When I heard the machine start agitating, I set the stove timer for five minutes.  When it went off, I took a peek…

As you can see, the stitches look almost the same as they did before I started the machine, so back in they went.  I set the timer for another five minutes when I heard the agitating start.

After the timer went off, I took another look…

As you can see, the pink bag looks the same; however, the yellow bag’s stitches are starting to lose their definition.  Notice the fuzz too.  That’s a good indication that felting has begun in earnest.

At this point, I had to drain the washer and refill it.  My power company will love me.

So, felting attempt #3 began…after I added an extra towel for more friction.  I set the timer for five minutes and waited, but still no cigar.

At least the pink bag was starting to felt in earnest, although it wasn’t done.  The yellow bag, however, looked like it might be finished.

I held it up against my personal bag…just to compare…


Nope…still not done.  I didn’t like the way the top was flaring, and I also didn’t like that it was still a little stretchy.  A felted purse should not be overly stretchy.  You want stability.  So, I stuck everything back in for a 4th round and five more minutes…

Looking better, but I didn’t trust my eyes, so I measured…

Yep!  It was done.

I pulled it out and put the pink bag in for two more rounds of ten minutes each.  At the end of 20 more minutes, it too was finished.  I don’t know why that bag was so stubborn.  Maybe the dye had something to do with it?  I don’t know.

To get the extra water out, I placed the bags and their straps on towels and rolled them up, squeezing gently…

And now…for more fun…prepping the bags to dry.

You would think it wouldn’t be complicated, but it really is.  This is an important step of the process to ensure that the booga bags maintain their shape.

First, you need to locate something to insert into the bottom.  I found a couple of things…

I wound up not liking the tea box, so I hunted for something else…finally settling on Pop Tart boxes and boxed broth…

Once I located the perfect boxes, I wrapped them in plastic bags.  I wanted to protect my bags from dye leakage from the cardboard packaging…

It is important to stretch the bottom of the bags over the boxes to ensure straight edges and rectangular bottoms…

Next, I needed to fill the rest of the bags.  Not only do you want the bottom to be shaped properly, but you need to maintain the line of the bag all the way to the top.  I used a combination of cut pieces of cardboard and packaged food from my pantry…


Some worked, and some didn’t, as evidenced by the bulge in the sides below…

So, I had to rearrange.  I like things to be just right…

Now it was time to dry!  I stretched out the straps and loosely tied them to my chairs.  I know, from experience, that crooked straps do stand out, and they aren’t pretty.  I also turned the bags over to allow the bottoms to dry…

The bags took a couple of days to dry.

And then more fun…adding the grommets and straps!  This was an experience all in itself.

I gathered my supplies…

I had already gone by Joann’s (with a 40% coupon) and purchased grommets.  After fixing my sister’s bag last week, I decided that every booga bag I make will include grommets.

I prepped one bag by inserting double pointed needles where I wanted them and eyeballed it from the front and the top…

I fully expected this to be a speedy part of the process, but alas it wasn’t.  I tore up two grommets before realizing that I had purchased grommets instead of eyelets.

Decision time…grommets or eyelets?  I decided to buy the tool for the grommets because the eyelets I’d placed on my own bag (after fixing my sister’s) were coming off.  I have another bag that I made last summer that had regular grommets.  They haven’t fallen off.

Back to Joann’s I went to purchase one more package of grommets and the tool…

Insert Tim the Tool Man grunting here…

Let me just say that I LOVE this tool!  It has a hole puncher that works fabulously.  Turn the plastic part around, and you have the base for setting the grommet.

I will say that I ruined one more grommet, and I couldn’t figure out why.  I’m AuburnChick…Goddess of Tools.

I ran to Google and found this video of how to attach grommets.  It was very helpful…

Thank goodness for YouTube!  I figured out that I was using the grommet pliers backwards.  Go figure.

After inserting the grommet barrel right side to back…

I strung the washer on the backside, dome side up…

And then fit the silver bulb part of the tool inside the grommet barrel and squeezed…

You know the grommet is clamped properly when you see crimping…

Next, it was time to thread the handles through the holes.  First, I cut the straps in half…

And then I threaded the straps through the holes…

And tied the straps at the sides…

VOILA!

But wait…I wasn’t done!

Felted projects have peach fuzz that needs to be shaved…

I went  over all sides with the fabric shaver (purchased at Michael’s a couple of years ago), the bottom, and the strap of each bag…

Shaving made a HUGE difference in presentation.  Look at the fuzz I removed from one bag…

What did I get when I was done?

BEAUTIFUL booga bags!!

I used 140 grams of yarn for the pink bag…

Bag #2 required 125 grams of yarn…

Notice the brass grommets?  I thought they matched nicely…

Two more projects off my needles and off my dining room table!  I’m a happy girl!

A Quick Fix

On Sundays, I tend to veg out and knit.

Having just finished the chemo cap (see previous post), I started trying to figure out what I wanted to make next.

My friend, Rabbitrescuer, is going to be working on her first pair of socks.  We’re going to do a KAL (that’s knit-a-long for all of my non-knitting readers).  I am honored that she is allowing me to walk her through the process.

We had been discussing which pattern to use, but we had not made a firm decision yet.  I knew she was working a 12-hour shift on Sunday, so that left me in a quandary.

What to do with myself.

You know you’re addicted to knitting when you wander around the house, lost for something to do despite having ironing and dirty dishes giving you the evil eye.

I managed to ignore them, as usual, and racked my brain.

Poor brain.  It cannot take too much.

I considered casting on a pair of socks for the fun of it…something I could work on until we started our KAL.  However, I was afraid to commit my needles in fear of needing them for whatever we would settle on.  I only own one set of each size of needles, so I’m stuck there.

In desperation, I meandered to one of my yarn baskets and pulled out the first skein my hand touched.

It was this:

Araucania Wool Chunky #134

Araucania Nature Wool Chunky #134

It had been a gift from another knitter who sent it to me along with an oddball blanket I was working on at the time.

Here it is all wound up:

Araucania Nature Wool Chunky #134

Araucania Nature Wool Chunky #134

With the yarn in hand, I sat down at the computer and pulled up Ravelry.  I love Ravelry for its search feature.

After plugging in the yarn, I found many, many pages of projects.  Most of them were too large for my one skein.  I found myself trying to decide between a couple of patterns, finally settling on Calorimetry, a free pattern from the Winter 2006 issue of Knitty.

What a fast knit!  It only took me about three hours.  I made myself finish binding off before going to bed at the late hour of 11:30.

I used the double rib invisible bind-off from the Interweave Knits Fall 2008 issue.  If you have this issue, it’s worth taking a look at.  I just love the finished edge…invisible, as promised.

A couple of notes before you get to see pictures (unless you’re cheating and already scrolled down).  I only cast on 92 stitches.  This pattern is notorious for turning out too big.  I also went down to a size 7 needle.  It fits using the hole closest to the end.  I do have big hair, though.  If you make this, you might want to venture nearer to 100 stitches.

The pattern only required 45 grams of yarn, so it’s a great way to use up some of that stash you might have.  I still have about half a skein left.

And now, here are some pictures of my project:

The color in this picture is a little bright.

The color in this picture is a little bright.

Thank goodness I save all of the extra buttons that come with my clothes.  I scrounged around and came up with one that worked.

This is the true color.

This is the true color.

Ok…off to take a peek at the pattern that Rabbit and I decided on.  More information on that later!

Evolution of a Knitter

Another finished project!!  I’m so excited!  I really needed something to cheer me up after a rough couple of days, eh?

Do you remember this yarn…

Misti Alpaca  Hand Painted Chunky - Colorway is Marvelous

Misti Alpaca Hand Painted Chunky - Colorway is "Marvelous"

It was soft enough to coax me away from the socks I have on my needles.

I have to tell you that I think I see signs that I am evolving as a knitter.  Here’s the process, as I see it.

When you first start knitting, you’re concerned more with the “how-to’s” of the stitches.  You pick easy patterns and use whatever yarn is handy.

Gradually, you start learning about different yarns as you begin to visit yarn stores and talking to other yarnies.  You start getting more selective with your patterns and begin challenging yourself with more difficult projects.

This is when you start investing in the good stuff…interchangeable needles, smooshy yarn, dazzly stitch markers.

Before you know it, you’re paying particular attention to the color variations within your yarn and how the pattern will complement them.

And then you start getting picky.  I mean, knitting is hard work, and the yarn is expensive.  You don’t want to waste your efforts for a project that does not turn out the way you envisioned it.

This is the stage that I’m at now.

I knew, when I bought the yarn, that I wanted to make a scarf.  The gal in the store suggested a 2×2 rib.  I decided to check Ravelry first, though, just in case I found a pattern I liked better.

First, I decided to make the Misti Chunk Ribs and Ruffles Scarf.  If you’re on Ravelry, you can find the pattern on this page.  You can also click on this link to download the pattern directly from the Misti Alpaca web site.

Well, after a couple of inches, I realized that I was not liking how it was coming out.  I had envisioned a thick scarf, similar in feel to my Palindrome Scarf, which I wear to all of the soccer games I attend.

So, I frogged and went back to the drawing board.

I decided to try the 2×2 rib, as suggested by the gal in the shop where I purchased the yarn from.

After a couple of inches of this pattern, it was apparent that this was not going to work either.

Ugh.

I was not happy.

So, I went back to Ravelry and searched again.  I went back and forth, trying to decide if I would attempt the Ribbed and Ruffle Scarf again or try something else.  I wondered if I was over-thinking things.

I posted an SOS in the Stitch-It forum.  Sometimes it helps to get the opinion of others.  By far, the pattern that got the most votes was My So Called Scarf.  You can find the Ravelry pattern link here, and the regular internet link here.

Did you know that patterns on Ravelry have a comments tab.  I have found it very helpful to check out the comments before starting a project.  Included in this pattern’s comments was this link to a video that demonstrated the strangely-worded stitch instructions.   Armed with the additional information, I cast on.

I began this project on the 20th of January and “officially” finished it this morning, the 28th.  In reality, the pattern was so simple that it shouldn’t have taken so long to complete; however, as you’ve been reading, my life has been hectic, leaving little time to work on it.  I used both skeins I had purchased.  The scarf measures 54″ x 4 1/2″.  Not too long, I know, but it’s perfect for my height, which is, to be politically-correct, “petite.”

Here are the results…

My So Called Scarf

My So Called Scarf

The next picture shows a good comparison of the wrong side (the left) and the right side (on the right)…

The next picture is a close-up of the stitch pattern.  As you can see, it really does showcase the yarn.

One special note:  if you make this scarf, make sure you check out the bind-off suggestion on the comments tab on Ravelry.  This scarf has a reputation for having a flared bind-off edge.  Of course, I had to learn the hard way and bound off the usual way…purling since I was on the wrong side.  The result was hideous.  So, I frogged that last row and followed the suggestion…to p2tog, p2tog, and then bring the first stitch over the second one (the one closest to the tip of the needle).  From there, you just p2tog and bring that first stitch over each time, as in a regular bind off.

Voila.  I had a straight edge.

Perhaps, one day, I’ll evolve to the next phase of knitting…writing my own patterns.  Time will tell.

The Knitting Bandit

I haven’t talked much about knitting lately.  That’s because I’ve been working on some projects and wanted to wait until they were completed to blog about them.

First of all, an explanation as to the title.  Have you ever left a gift at someone’s door, rang the doorbell, and run?  Well, perhaps your gift wasn’t so nice, and that’s the reason you ran.  We have a Halloween tradition in our neighborhood where you leave candy at a door, ring the doorbell, and run…surprising those inside.  That’s what I felt like this week.

I finally finished the Leaf Lace Scarf that I started way back in July.  Here’s the link for the free pattern.

Leaf Lace Scarf

Leaf Lace Scarf

The pattern really is easy.  The only reason why it took me so long is because I got sidetracked a few times with other projects, putting it down completely during the Olympics.

This project has a story…but of course you know that because everything AuburnChick does includes a story…

First of all, the pattern was sent to me by my Christmas KH Swap partner, who had also sent me some kettle-dyed yarn.  I had a horrendous time getting the scarf to look right because the yarn was just too thin, even though it was lace weight.  So I set it aside for about six months.  During that time, a different KH knitter found out that I had never touched Malabrigo…never even seen it in real life.  She generously sent me three skeins….two blue worsted weighted and one lace weight “Lettuce.”  You see, we had discovered that we were both working on the same scarf, although she was having much more success using the Malabrigo.  She surprised me with the skein I needed for this project.

That said, I finally got up the courage to try the pattern again…with the new yarn.  What a dream!  Malabrigo is all it’s talked up to be.  It slides through your fingers so smoothly that you hardly know it’s there.  As your project grows, you quickly discover its warmth.

Shortly after I cast on, my friend Christina (aka Rabbitrescuer on Ravelry and KH) had to rush her son, Austin, to the hospital.  He received 2nd and 3rd degree burns on 68% of his body and is currently receiving care at a Shriner’s Hospital.  You’ve heard me mention her before, but she’s important to this story.

I’ve been the liaison between her and the online community.  As a result, I’ve been blessed to become friends with her in real life.  I talk to her on the phone three or four days a week.  She is such a sweet gal…very soft spoken and incredibly generous.  We’ve had a lot of fun discussing our passion for yarns and projects.  If you’re on Ravelry, look her up and check out her stash.  Make sure you’re sitting down first, though, or else you’ll pass out from sheer amazement at the volume.

Anyhow…I have come to know several things about her.  First of all, her favorite color is green.  Secondly, she loves Malabrigo.  And third…during one of our chats, I shared that I was working on this pattern and provided a link.  She told me that she had queued the pattern to make at a later time.  By now, I had already decided that I was gifting this to her.  The revelation that she wanted to make this pattern was God’s voice in my ear…”That scarf you’re making belongs to Rabbit.”

Yes, Lord, I know.  Thank you for confirming what I thought I was hearing.  How nice to hear His will so clearly.

Somehow, making that decision changed the project from tedious to joyful.  It flew off of my needles from that point on.  I completed 37 pattern repeats before binding off.  And blocking, which is normally not my forte, went much easier too.  Check out these pictures…

Blocking the Leaf Lace Scarf Using the KnitPicks Lace Blocking Kit

Blocking the Leaf Lace Scarf Using the KnitPicks Lace Blocking Kit

The Finished Scarf...67 1/2 x 7 3/4

The Finished Scarf...67 1/2" x 7 3/4"

I have to say that I am so proud of the scarf.  When I picked it up after it was dry from blocking, it was light and airy and draped beautifully across my arm.  I photographed it, packed it carefully, and put it in the mail immediately.

Buoyed by the joy that accompanies gifting homemade items, I started work on my next project.

This one is called the Warm Stripings Hat, from the Creative Knitting Magazine (January 2008).  One of Soccer Chick’s teammates asked me to make her a hat and described some of the featurs she wanted.  This pattern fit the bill.  I ordered the yarn recommended by the pattern:  Vero, color #18.

Naturally Vero (Fiber Trends) - Color #18

Naturally Vero (Fiber Trends) - Color #18

Even though this teammate is no longer playing for Chick’s team (although she has already committed to play at a large university, and she’s only a junior!), I couldn’t forget my promise to her…especially since I had already ordered the yarn for the project!  Here’s the finished product, modeled by my straw broom:

Warm Stripings Hat

Warm Stripings Hat

A Close-Up of the Earflap

A Close-Up of the Earflap

I’ve gotta tell you that this hat almost didn’t happen this week.  When I sat down to start a new project after the scarf, I quickly realized that I didn’t really have the needles I needed.  Oh, I had the right size, but not the correct size cables or dpns.

This is where you say, “Magic Loop.”  Thank goodness for this method and the fact that I made myself learn it a few months ago.  Also, kudos to interchangeables!  KnitPicks sends you little cap things with each cable needle.  I never knew how to use them before this project.

In the photo above, I had used one cable, with needles on the ends, to work a flap and  i-cord.

One Cable...I-Cord

One Cable...I-Cord

I used an empty cable with caps on the end to hold the other stitches, which I would work on after finishing up the other side.

KnitPicks Cable and Cap

KnitPicks Cable and Cap

KnitPicks Cable and Cap

KnitPicks Cable and Cap

Perhaps you’re thinking, “easy, peasy.”  Not for me.  These things require my brain to work overtime…something I’m not good at.  But I’m glad I put in the extra effort.  It saved me money and time.

I test drove this hat on a couple of teens, who gave me a resounding Thumbs-Up, informing me that this hat is tres chic.  In other words, they want one too.

I excitedly put the hat in the mail this morning, wrapped in tissue paper and ribbon.  I wish I could see the look on the recipient’s face, but just the knowledge of having done the deed and run…

Well, that is what I call a knitter’s ultimate joy.

The joy is in the giving and the surprise felt by the other person at the unexpected package of love.

My First Malabrigo!

Well folks..after knitting for almost two years, I finally got my hands on some of that famous yarn…Malabrigo…better known as Mmmmmm.

Just how I obtained it is a story in itself.

One evening, while I was chatting on KnittingHelp.com, the subject of Mmmmmm came up. I lamented how I’ve never seen or touched it before. Well, a couple of the chatters were flabbergasted! They simply could not understand how I had gone so long without laying eyes on this precious, spun gold.

One of the gals generously offered to send me one skein…no repayment allowed. At first, I didn’t know what to say. I was a bit shy about accepting her offer, but she insisted that she wanted to do this. The only she asked was that I Pay it Forward.

That, my dear readers, is an easy thing for a knitter to do. It is my opinion that crafters are among the most generous people in the world. Forget Bill Gates. Forget Donald Trump (yes, let’s do). Have you ever seen these men knit baby blankets? No way, Jose.

On Monday, I had a package in the mail. It was THE package. I had run by the house on my way to my son’s school. As I spied the package, I decided that I needed to wait until I was settled in car loop — so that I could devote my full attention to the contents.

On the way to the school from my house, Mr. AuburnChick called my cell phone, asking if I had read my email that day. Uh, no, dear. I just got off of work, and I have this package that I must dive into. Oh, he says, there’s some important stuff about Little Ms Chickadee.

Grrr…I really don’t like him telling me what an email says. I don’t know. It’s kind of like telling me what’s in a present before I open it. I know, I know…it’s just email. Sorry, but that is one of my quirks.

So, on the way to the school, I made a pit stop at the library. I had to return some books, and I knew they had free internet service, where I could jump online and check my email. So I did. After reading about 15 messages, one of which contained an email from a college coach about Little Ms’s weekend performance (see previous blog entry), I signed off.

My mind was on that package. Forget the fact that this could be the college that offers my daughter a soccer scholarship. Oh no. I knew that something special was waiting for me in the car.

Priorities, people…priorities.

I dash to the car and hurry to the school. Parking brake set…check. Package in hand…check.

My hands were shaking. I gingerly tore the end off of the envelope. A sweet note was included:

“Dear Nathalie,

I just couldn’t resist! Enjoy!”

I proceeded to the plastic wrapped bundle. Upon opening it, I found this…

Yes…I know! It’s TWO skeins of Bijou Blue Malabrigo!!! Oh my, is it soft! I sat in the car holding one on each side of my neck, envisioning them as a scarf.

But wait…there was something else in the package. Eh? What’s this?

Yep. A THIRD skein! The color is Lettuce. I had to chuckle. This was an inside joke. Ok. I’ll share it with you.

Generous Knitter is also on Ravelry, and awhile back, I commented on a project she has been working on. Turns out, we’ve both been struggling with the Leaf Lace Scarf pattern. It recommends the Lettuce yarn.

So, here’s to my friend, who serves as a reminder that there truly are nice people out there in the world. I never doubted that, but it’s always nice to have a personal reminder.

Now…let me tell you. Mmmmmm is not the only yarn that showed up on my doorstep that day…

That’s my latest order from purlsoho.com. It’s Alchemy Sanctuary, which is a silk/wool blend. Divine, I tell you…just divine! The color on the left is Topaz, and the one on the right is Boo’s Garden. I’m going to make more of these fingerless gloves. If you recall, I made a pair about a month ago. It is one of the easiest patterns! The only thing you have to watch for is when casting off the stitches for the thumb gusset. You can’t forget to cast off that 10th stitch, which means you will probably have to grab a stitch from the next needle. You’ll understand what I mean when you make them.

I’m going to knit up the Topaz for a gal at work. She admired my other pair and commented about how cold her hands get at work when she’s typing on the computer. I chose this color specifically with her in mind, thinking that the neutral color will go with anything.

The green is a selfish gift to myself. I’ll get around to knitting it up. Eventually. It’s such a fast knit that I could do them in a day.

Now…on to other things.

I am making progress on the comfort throw. The pattern is actually for a cabled pillow that uses the Saxon Braid. I found the pattern in this booklet…

The Saxon Braid pattern is also located on this page. I have completed three full pattern reps and will complete the fourth one tonight. My plan is to knit one repeat each day. I’m going to make six repeats in total and end the blanket with six rows of garter stitch. The cable is awesome and not too intimidating. A few of the rows are harem scarem, but I’ve been concentrating like crazy and haven’t encountered any problems.

I am making the cables without cable needles, which has sped up the progress tremendously! I used this site and this site to help me. I have to say that knitting without the extra cable needle is actually very intuitive. I was really tired last night but insisted on finishing that last pattern row before going to bed. I kept catching myself messing up…all because the stitches just weren’t flowing right. So, if you’ve been hesitant to try cables, don’t be! They are really very simple!

Well, that’s it for now. Off I go to work some more!