

Ok…so I haven’t blogged in a couple of days.
But, I had good reason! I was busy finishing up a couple of projects and working on my super-secret project.
I’ve mentioned how I’m working on two Black Sheep Booga Bags. Well, I’m happy to report that they are now FINISHED! Woo Hoo! (insert happy dance)
Before I started felting them, I thought to myself…”AuburnChick, some people out there either don’t know what felting is or are too intimated to give it a try. Why don’t you show your faithful two readers (and anyone who might accidentally stumble on your blog) how it’s done?”
“Ok,” I said to myself, since not too many people tend to answer me back IRL (in real life).
WARNING: This post is VERY picture-heavy. I couldn’t help myself. I am the Queen of do-it-yourself and pride myself on photographing each step of the process.
I started off with three skeins each of Noro Kureyon #95 and Noro Kureyon 209…

- Noro Kureyon 95

- Noro Kureyon 209
The knitting went quickly. I finished up #209 first. This is the bag that will be for the Mr.’s grandmother for Christmas. She loves jewel tones.

The bag measured 13 x 12 pre-felting
Bag #2 is for a friend who saw my personal booga bag (I use it as a regular purse) and asked me to make one for her to gift to someone. She ordered the yarn and gave it to me when it arrived.
I knit most of Bag #2 last Friday and finished it on Saturday.

This bag measured 13 x 11 pre-felting
Sunday was designated as felting day.
First of all, what is felting? Well, the easiest way to explain this is to ask a question.
Have you ever thrown a sweater in the wash and had it come out all shrunken and fuzzy?
Then you’ve felted.
100% wool is a fiber that is ideal for felting. The fibers shrink and lose their definition when they are submerged in water and agitated. What you wind up with is a small, dense product.
As you can see from my pictures above, the purses would not be very useful before felting as pens and other small items would slip through the stitches. That’s where the magic comes in.
First, I tied my bags and their handles in pillowcases. I secured them with rubber bands. This serves two purposes. First, my knit items wouldn’t get hung on the agitator…especially the strap. Second, when felting, pieces of fiber come off of the pieces. These pieces can clog the washing machine and get stuck on the other items placed in the machine. The pillowcases keep everything contained.

- Each bag and corresponding strap went into its own respective case. You don’t want to mix different colored fibers.
Next, I set my washing machine’s water temperature at the hottest setting possible. I also set it for the smallest load and added a couple of pairs of blue jeans and a couple of full-sized towels. These items add friction and help items felt more quickly. One last thing I did was set the wash cycle to extra-heavy. I wanted my load to get an extra beating.

When I heard the machine start agitating, I set the stove timer for five minutes. When it went off, I took a peek…

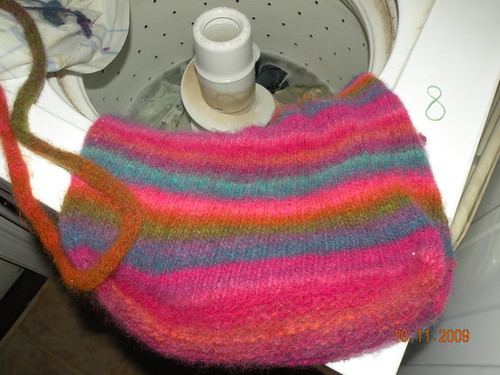


As you can see, the stitches look almost the same as they did before I started the machine, so back in they went. I set the timer for another five minutes when I heard the agitating start.
After the timer went off, I took another look…


As you can see, the pink bag looks the same; however, the yellow bag’s stitches are starting to lose their definition. Notice the fuzz too. That’s a good indication that felting has begun in earnest.
At this point, I had to drain the washer and refill it. My power company will love me.
So, felting attempt #3 began…after I added an extra towel for more friction. I set the timer for five minutes and waited, but still no cigar.


At least the pink bag was starting to felt in earnest, although it wasn’t done. The yellow bag, however, looked like it might be finished.

I held it up against my personal bag…just to compare…

Nope…still not done. I didn’t like the way the top was flaring, and I also didn’t like that it was still a little stretchy. A felted purse should not be overly stretchy. You want stability. So, I stuck everything back in for a 4th round and five more minutes…

Looking better, but I didn’t trust my eyes, so I measured…


Yep! It was done.
I pulled it out and put the pink bag in for two more rounds of ten minutes each. At the end of 20 more minutes, it too was finished. I don’t know why that bag was so stubborn. Maybe the dye had something to do with it? I don’t know.

To get the extra water out, I placed the bags and their straps on towels and rolled them up, squeezing gently…


And now…for more fun…prepping the bags to dry.
You would think it wouldn’t be complicated, but it really is. This is an important step of the process to ensure that the booga bags maintain their shape.
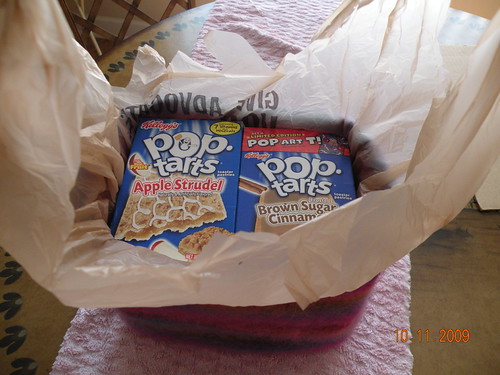
First, you need to locate something to insert into the bottom. I found a couple of things…


I wound up not liking the tea box, so I hunted for something else…finally settling on Pop Tart boxes and boxed broth…

Once I located the perfect boxes, I wrapped them in plastic bags. I wanted to protect my bags from dye leakage from the cardboard packaging…

It is important to stretch the bottom of the bags over the boxes to ensure straight edges and rectangular bottoms…


Next, I needed to fill the rest of the bags. Not only do you want the bottom to be shaped properly, but you need to maintain the line of the bag all the way to the top. I used a combination of cut pieces of cardboard and packaged food from my pantry…

Some worked, and some didn’t, as evidenced by the bulge in the sides below…

So, I had to rearrange. I like things to be just right…

Now it was time to dry! I stretched out the straps and loosely tied them to my chairs. I know, from experience, that crooked straps do stand out, and they aren’t pretty. I also turned the bags over to allow the bottoms to dry…


The bags took a couple of days to dry.

And then more fun…adding the grommets and straps! This was an experience all in itself.
I gathered my supplies…

I had already gone by Joann’s (with a 40% coupon) and purchased grommets. After fixing my sister’s bag last week, I decided that every booga bag I make will include grommets.

I prepped one bag by inserting double pointed needles where I wanted them and eyeballed it from the front and the top…


I fully expected this to be a speedy part of the process, but alas it wasn’t. I tore up two grommets before realizing that I had purchased grommets instead of eyelets.

Decision time…grommets or eyelets? I decided to buy the tool for the grommets because the eyelets I’d placed on my own bag (after fixing my sister’s) were coming off. I have another bag that I made last summer that had regular grommets. They haven’t fallen off.
Back to Joann’s I went to purchase one more package of grommets and the tool…
Insert Tim the Tool Man grunting here…


Let me just say that I LOVE this tool! It has a hole puncher that works fabulously. Turn the plastic part around, and you have the base for setting the grommet.
I will say that I ruined one more grommet, and I couldn’t figure out why. I’m AuburnChick…Goddess of Tools.
I ran to Google and found this video of how to attach grommets. It was very helpful…
Thank goodness for YouTube! I figured out that I was using the grommet pliers backwards. Go figure.
After inserting the grommet barrel right side to back…

I strung the washer on the backside, dome side up…

And then fit the silver bulb part of the tool inside the grommet barrel and squeezed…

You know the grommet is clamped properly when you see crimping…

Next, it was time to thread the handles through the holes. First, I cut the straps in half…

And then I threaded the straps through the holes…

And tied the straps at the sides…

VOILA!
But wait…I wasn’t done!
Felted projects have peach fuzz that needs to be shaved…

I went over all sides with the fabric shaver (purchased at Michael’s a couple of years ago), the bottom, and the strap of each bag…

Shaving made a HUGE difference in presentation. Look at the fuzz I removed from one bag…

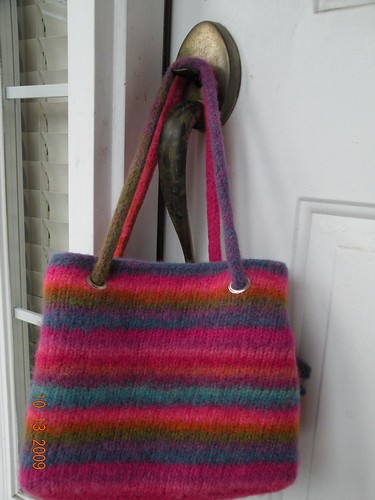
What did I get when I was done?
BEAUTIFUL booga bags!!

I used 140 grams of yarn for the pink bag…


Bag #2 required 125 grams of yarn…


Notice the brass grommets? I thought they matched nicely…


Two more projects off my needles and off my dining room table! I’m a happy girl!
Filed under: Knitting | Tagged: black sheep booga bag, felting, Knitting, noro kureyon, wool | 22 Comments »


